In Dabbling in DMR Part 1 I mentioned that I had some issues getting the MMDVM hotspot configured. I watched several videos on YouTube showing how to configure the MMDVM hotspot (I will link to them at the end of this post) and several mentioned using the Pi-Star WiFi builder to generate a file that then just needs to be added to the root of the micro-SD card containing the software and that, once the card is inserted back into the MMDVM, it would read the file on boot-up and connect to your WiFi. I tried that, several times, and it didn’t work. I wasn’t seeing anything on the OLED screen either. After thinking about it for awhile I decided that the software, and the provided micro-SD card, probably weren’t any good. I purchased a good quality micro-SD card and downloaded the Pi-Star software and flashed it to the new card. I tried the WiFi builder again but that still didn’t work. Although the WiFi builder didn’t add the MMDVM hotspot to my network I did see a Pi-Star “network” when I looked at available WiFi networks. A new challenge but some progress. After some research I learned that I needed to disconnect from my home WiFi and connect to the Pi-Star with the username “pi-star” and the password “raspberry”. Once I did that I was able to set the configuration for my home WiFi. Once I rebooted the hotspot, and reconnected to my home WiFi, I typed “pistar” into a browser…but it just searched the internet for pistar. I tried pi-star and got the same results…I also tried several different browsers. I downloaded an IP scanning tool (the one I used you can run it as a portable app with out installing) and was able to run it and it located the hotspot. I put the IP address into the browser and it brought up the configuration screen. You will need to use the password “raspberry” here as well.

Once you log in you will be at the dashboard. Once it is up and running you will see hotspot activity here. To get to the configuration screens click on the Configuration link in the header section.

One note of importance. As you configure each section, click the “Apply Changes” button for that section or the changes will not be saved. It does not work where clicking the button for any section will save changes for all sections.
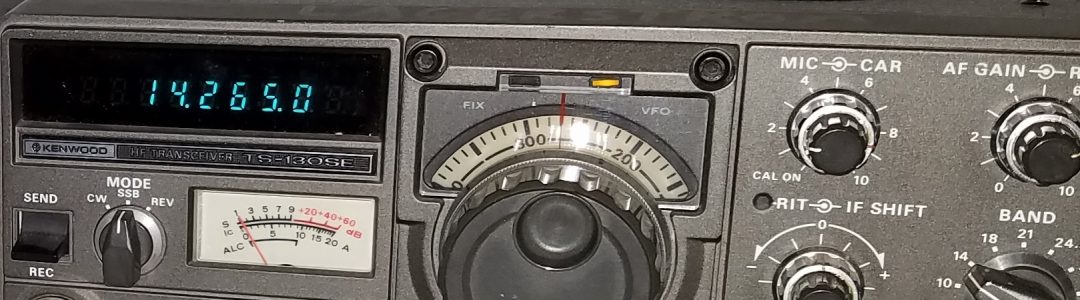
I configured my hotspot as simplex for DMR only. I selected MMDVM Display Type of OLED Type 3 with a port of /dev/ttyAMA0 and Nextion Layout of G4KLX. Why those particular values for the MMDVM Display Type? Because that is what the Hams in the videos did and their reasoning was that it was they found to use in their research and it worked. I suppose you could try different settings to see what they do. This also goes for a few other configuration settings. I used what was shown in the videos and they seem to work. Be sure to click “Apply Changes” when you make changes in the Control Software or MMDVMHost Configuration sections.

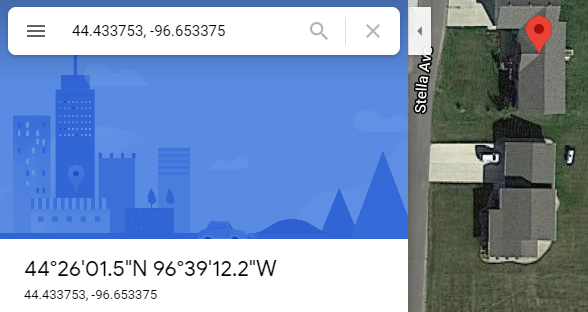
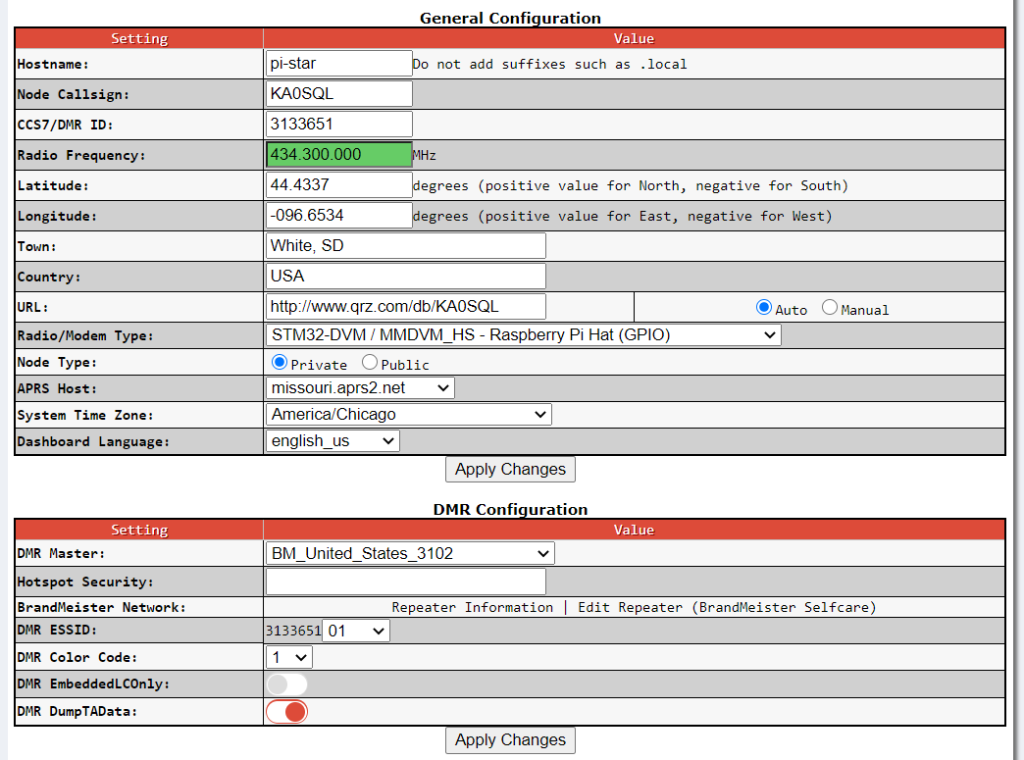
In the General Configuration section enter your callsign and DMR ID along with a frequency to use with your hotspot…I chose to use the same frequency I selected for the ZumSpot-USB. Also enter your geographical information. You can find your Lat/Long coordinates by going to Google Maps, zoom in on your location and clicking. The coordinates will appear in the left-hand sidebar.
You can also enter a URL for your QRZ page, or other URL, if you wish. For the Radio/Modem Type I went with what was suggested by the videos I watched. I decided to make my hotspot private and selected the APRS host that was closest along with the appropriate Time Zone and language for me. Be sure to Apply Changes.
In the DMR Configuration section I selected one of the Brandmeister United States talkgroups. For the ZumSpot-USB I went with 3101, for this one I decided to go with 3102. I set the color code to 1. Apply Changes.
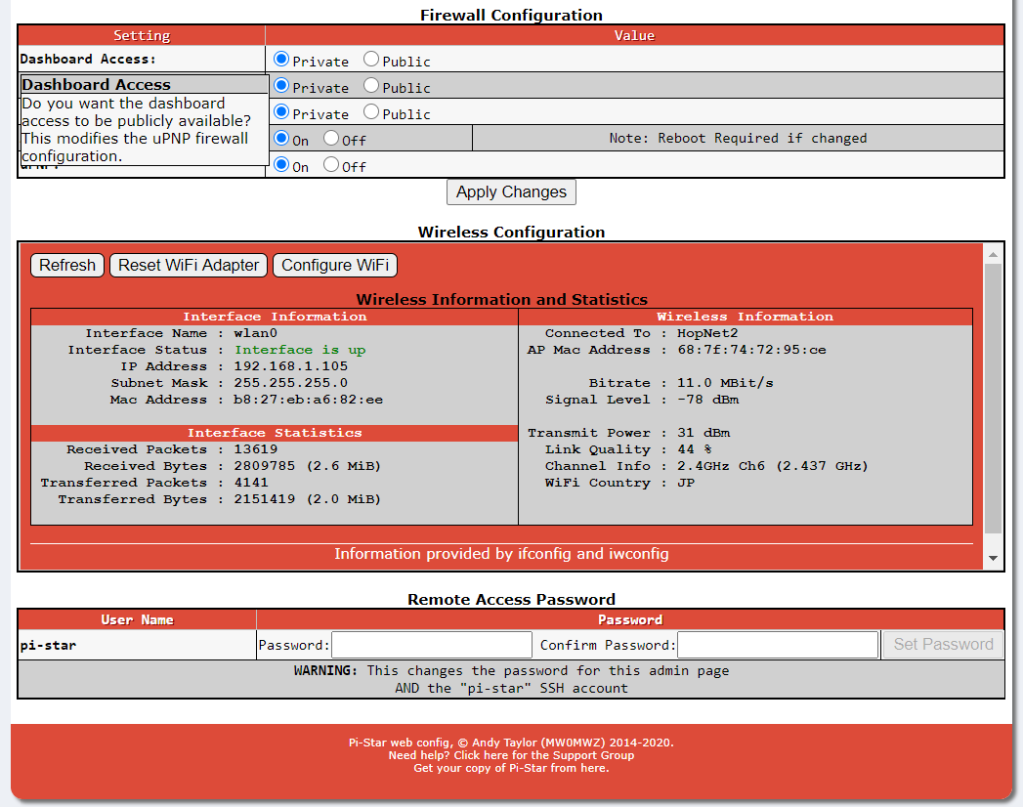
I didn’t make any changes to the Firewall Configuration, the Wireless Configuration I had set up before I was able to connect to my home WiFi network. I didn’t set up a Remote Access Password since I will only connect to it from my home network. If you do make changes…Apply Changes.
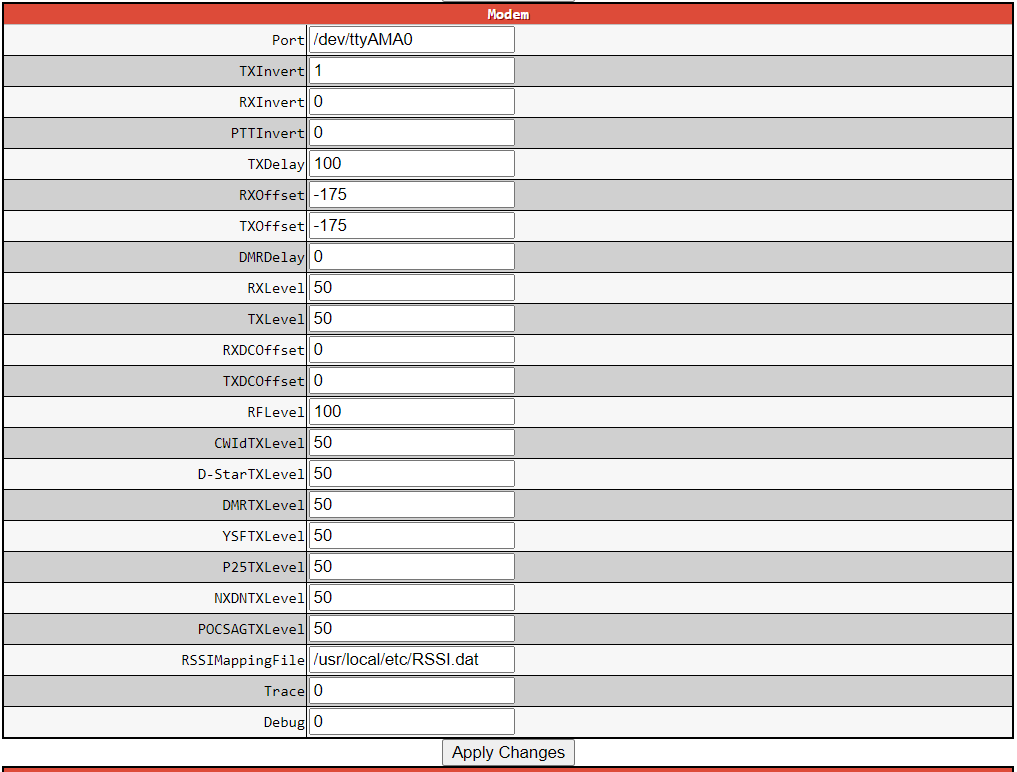
After I had everything configured I kerchuncked to get the hotspot to connect to the talkgroup…and nothing. I recalled one of the videos creators mentioned that his hotspot had a sticker with an offset since these low cost MMDVM hotspots aren’t dead on for their frequency. My hotspot didn’t have a sticker so I had to figure out what offset I needed. To do this I had to click the Expert link in the Configuration dashboard to enter the Expert Mode configurations.
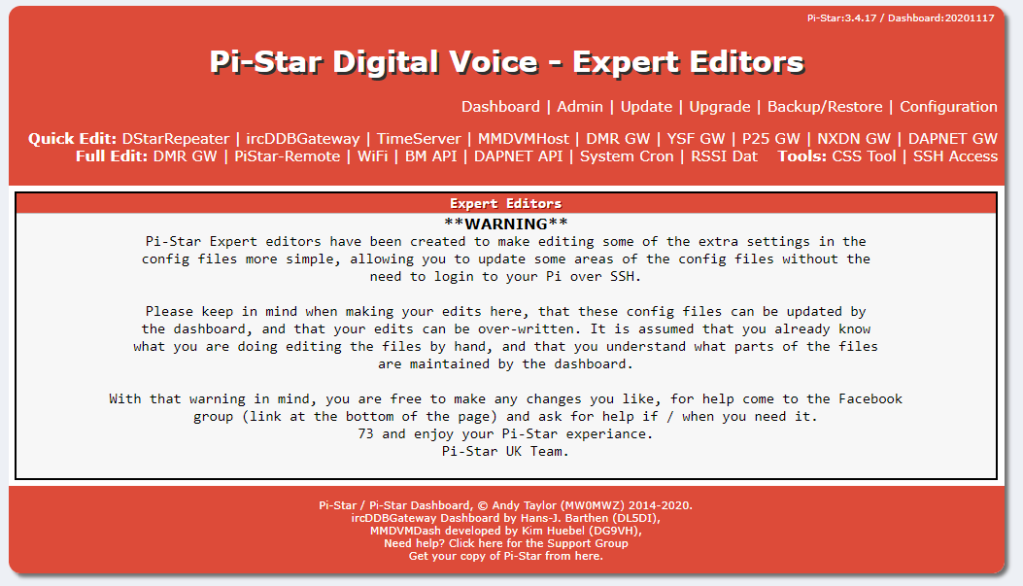
You get a warning that essentially tells you that you can really mess things up if you start changing things randomly. I had watched where the offset changes were made in the YouTube video and that was the only thing I touched.
I started by increasing the Rx and Tx offset by 100, Applying Changes and rebooting the hotspot. Then try to kerchunck. If that didn’t do anything add another 100 and repeat. Once I got some activity on the Pi-Star dashboard I started working back down in smaller increments watching the Bit Error Rate (BER). Once it started increasing I would reverse direction with smaller increments continuing the bracketing process until I finally found a Rx and Tx offset that had a low BER. If you work up the positive numbers with no result try negative offsets. I found my sweet-spot was -175 for Rx and Tx offset.
Once it is up and running you will see activity on the Pi-Star dashboard.
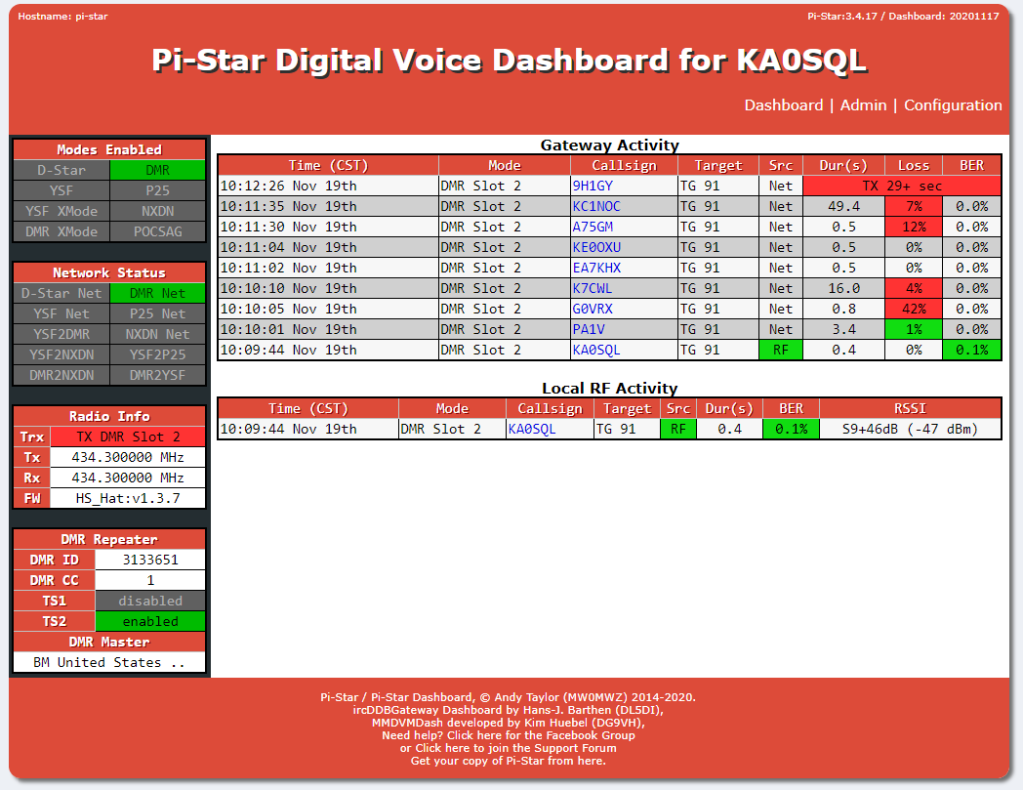
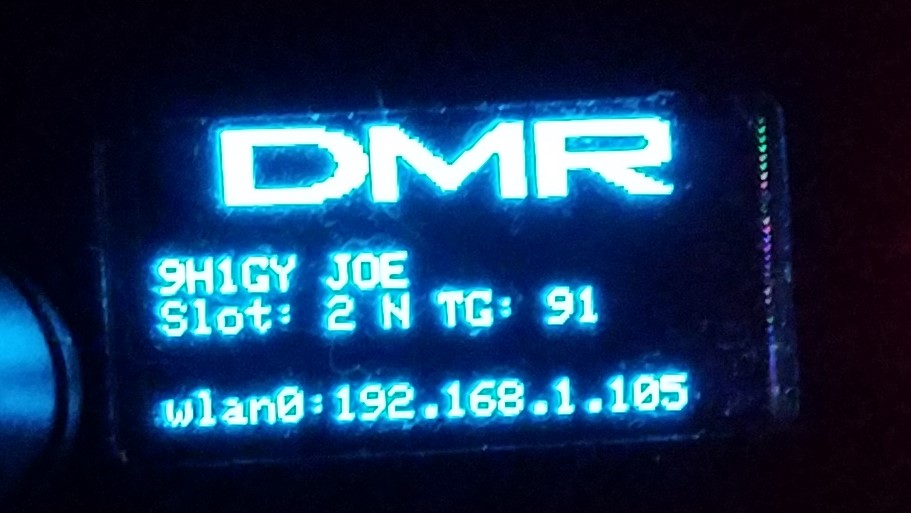
You can also see activity on the OLED screen on the hotspot itself. I find it interesting to take a peek at the hotspot when I am not using my radio and seeing call activity on the talkgroup being displayed on the hotspot.
Here are the links to the videos I watched to figure out setting up my hotspot:
JumboSpot MMDVM D-Star/DMR/C4FM/P25/NXDN Hotspot Pi-Star by Ham Radio Concepts
Pi-Star/DMR Complete Tutorial Hotspot Programming by Ham Radio Concepts
Pi-Star Hotspot setup full tutorial for beginners (shows pi-star wifi) by radiosification
73
KA0SQL
